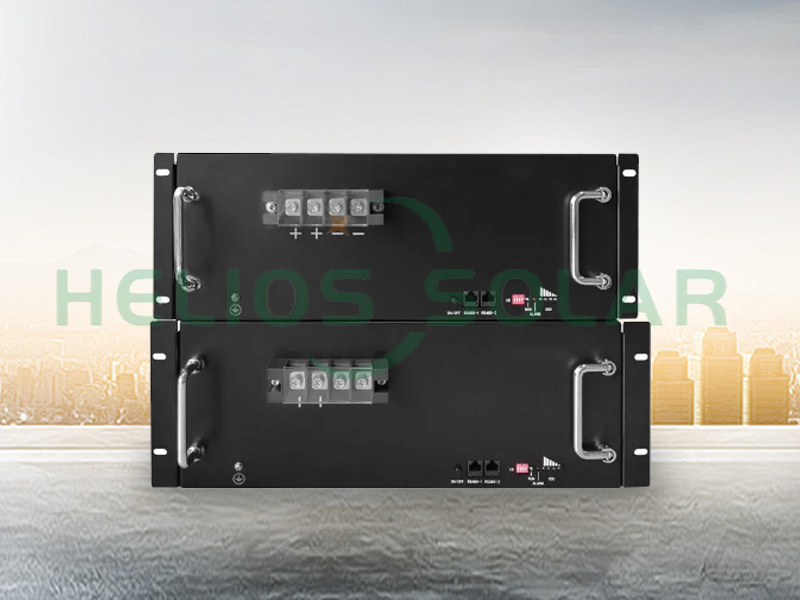
The demand for efficient, reliable energy storage solutions has surged in recent years, particularly in commercial and industrial settings. Among the various options available, rack-mounted lithium batteries are a popular choice due to their compact design, high energy density, and long cycle life. This article takes an in-depth look at the installation of rack-mounted lithium batteries, providing a step-by-step guide to ensure a safe and effective installation.
Learn about rack-mounted lithium batteries
Before diving into the installation process, it’s necessary to understand what a rack-mountable lithium battery is. These batteries are designed to be installed in standard server racks, making them ideal for data centers, telecommunications and other applications where space is at a premium. They offer several advantages over traditional lead-acid batteries, including:
1. Higher Energy Density: Lithium batteries can store more energy in a smaller footprint.
2. Longer Service Life: If properly maintained, lithium batteries can last up to 10 years or more.
3. Charges Faster: They charge faster than lead-acid batteries.
4. Low Maintenance Cost: Lithium batteries require minimal maintenance, thus reducing operating costs.
Installation preparation
1. Assess your power needs
Before installing a rack-mounted lithium battery, it is important to evaluate your power requirements. Calculate the total energy consumption of the devices you plan to support and determine the required capacity of the battery system. This will help you choose the correct battery model and configuration.
2. Choose the right location
Choosing the correct location for battery installation is critical. Make sure the area is well ventilated, dry and free of extreme temperatures. Rack-mounted lithium batteries should be installed in a controlled environment to maximize their service life and performance.
3. Gather necessary tools and equipment
Before starting the installation, gather all necessary tools and equipment, including:
- Screwdriver
- Wrench
- Multimeter
- Battery Management System (BMS)
- Safety equipment (gloves, goggles)
Step by step installation process
Step 1: Prepare the rack
Make sure the server rack is clean and free of clutter. Check that the rack is strong enough to support the weight of the lithium battery. If necessary, reinforce the rack to prevent any structural problems.
Step 2: Install the battery management system (BMS)
BMS is a key component that monitors battery health, manages charge and discharge, and ensures safety. Install the BMS according to the manufacturer’s instructions, ensuring it is securely mounted and properly connected to the battery.
Step 3: Install lithium battery
Carefully place the rack-mounted lithium battery into the designated slot in the server rack. Make sure they are securely fastened to prevent any movement. Manufacturer’s guidelines for battery orientation and spacing must be followed to ensure optimal performance and safety.
Step 4: Connect the battery
Once the batteries are installed, it’s time to connect them. Use appropriate cables and connectors to ensure all connections are secure and secure. Pay attention to polarity; incorrect connections may cause system failure or even hazardous conditions.
Step 5: Integrate with the power system
After connecting the battery, integrate it with your existing power system. This may involve connecting the BMS to an inverter or other power management system. Make sure all components are compatible and follow the manufacturer’s integration guidelines.
Step 6: Perform security check
Before starting your system, perform a thorough security check. Check all connections to ensure the BMS is functioning properly and verify that the battery shows no signs of damage or wear. It is also recommended to use a multimeter to check voltage levels and make sure everything is operating within safe parameters.
Step 7: Power up and test
After completing all checks, start the system. Closely monitor the performance of rack-mounted lithium batteries during the initial charge cycle. This will help detect any potential problems early. Pay close attention to the BMS readings to ensure the battery is charging and discharging as expected.
Maintenance and monitoring
After installation, regular maintenance and monitoring are critical to ensure the longevity and efficiency of rack-mounted lithium batteries. Implement a routine inspection schedule to check connections, clean the area around the battery, and monitor the BMS for any alarms or warnings.
In summary
Installing rack-mounted lithium batteries can significantly enhance your energy storage capabilities, providing reliable, efficient power for a variety of applications. By following the steps outlined in this guide, you can ensure a safe and efficient installation process. Remember, proper planning, preparation, and maintenance are keys to maximizing the benefits of your lithium battery system. As technology continues to evolve, investing in advanced energy storage solutions such as rack-mounted lithium batteries will undoubtedly pay off in the long run.
Post time: Oct-23-2024


